
Quick buyer overview
This long-form guide is now organized for faster scanning. Jump to the section you need, search other Shopye articles, or continue reading the full wholesale breakdown.
- Compare MOQ, pricing, and supplier reliability before ordering.
- Use the section index to jump straight to price, supplier, or FAQ details.
- Search more wholesale guides without leaving the article page.
Selling on Amazon in 2026 has become one of the most exciting opportunities for entrepreneurs, small business owners, and anyone looking to earn income online. With millions of customers browsing the platform every day, your products have the potential to reach a global audience instantly. Whether you are testing a new product, launching your own brand, or scaling an existing business, Amazon provides the tools, logistics, and customer trust to help you succeed.
The process of becoming a seller has changed significantly with the introduction of High-Trust Verification. Amazon no longer approves accounts instantly; instead, it uses AI-assisted checks to verify your identity, documents, and business credentials. This means preparation is crucial. You need to treat your seller account like a formal business application, ensuring your documents, bank accounts, and branding are all accurate and complete. Doing so will not only speed up your approval but also set you up for long-term success on the platform.
If you’re wondering how to become a seller on Amazon in 2026, this guide will walk you through every essential step. From selecting the right plan, finding the right Amazon FBA suppliers, and completing KYC compliance to listing your products and protecting your brand, you will learn exactly what it takes to start selling confidently and efficiently in the modern Amazon marketplace. By following this guide, you can avoid common mistakes, save time, and position your business for growth right from day one.
How to Become a Seller on Amazon in 2026 | Step-by-Step Guide
Step 1: Choosing Your Amazon Seller Plan

Choosing the right Amazon seller plan is one of the first and most important decisions you will make when starting your business in 2026. Amazon offers two main plans: the Individual Plan and the Professional Plan, and each is designed to suit different types of sellers. Understanding the differences between them will help you make smarter decisions about how to list, sell, and scale your products.
The Individual Plan is ideal if you are just starting out, testing products, or planning to sell fewer than 40 units per month. With this plan, you pay $0.00 per month, but there is a $0.99 fee for every item sold. This setup allows you to explore Amazon’s marketplace without a large upfront investment. It is a good way to get familiar with Seller Central, learn how to auto find product opportunities, and understand how your listings perform before committing to a larger plan.
The Professional Plan costs $39.99 per month and is designed for sellers who want to grow and scale quickly. This plan gives you access to advanced tools like bulk listing uploads, promotional options, and eligibility for the Buy Box—the Featured Offer that can dramatically increase your sales. The Professional Plan is the better choice if you plan to sell more than 40 units per month or want to take advantage of Amazon’s marketing tools and analytics to optimize your product listings.
In 2026, Amazon also emphasized the “40-Unit Rule.” If your sales consistently exceed 40 units per month, moving to the Professional Plan is recommended. This rule helps you stay competitive, unlock growth features, and ensure your account is fully optimized for the platform’s advanced systems.
Before you begin selling, decide which plan fits your goals. Whether you start small with the Individual Plan or go all in with the Professional Plan, choosing the right setup from the beginning will make it easier to manage your Seller Central account, auto-find product opportunities, and set yourself up for success on Amazon.
Step 2: KYC and Document Verification
Amazon seller account setup verification process in 2026 has become stricter and more advanced, thanks to its AI-driven system. This system is designed to ensure that every seller on the platform is legitimate, trustworthy, and fully compliant with regulations. For you as a new seller, understanding how this process works and preparing your documents carefully is critical to getting your account approved without delays.
At the core of Amazon’s AI-driven verification is KYC compliance. This means you need to prove your identity and business credentials accurately. You will be asked to provide several important documents. First, a government-issued ID, such as a passport or driver’s license, is required to confirm your legal identity. Next, a recent bank statement or credit card statement from the last 180 days is needed to link your financial accounts. Finally, you will provide your EIN if you are a registered company or your SSN if you are an individual or sole proprietor. These documents allow Amazon’s system to verify your identity and financial credibility.
Amazon’s AI system emphasizes Document Integrity, which means your scans must be high-resolution and all information must match your accounts exactly. For example, the name on your ID must match the name on your bank account, and all addresses must be consistent. Any discrepancies, even small ones like “St.” versus “Street,” can trigger a manual review and delay your approval.
In some cases, you will also complete a live video verification. During this process, an Amazon agent may ask you to show your documents on camera, answer questions about your business, and confirm your verified business address. The system will scan, validate, and verify your information automatically, but accuracy and preparation are key.
By preparing your documents carefully, scanning them clearly, and ensuring every detail matches, you can move through Amazon’s AI-driven verification smoothly. This step is crucial to establishing trust, unlocking Seller Central features, and starting to sell confidently on the platform.
Step 3: The Live Identity Interview
Live Video Call Verification is a key part of Amazon’s High-Trust Verification process in 2026. This step allows Amazon to confirm your identity and business credentials in real time, making sure your account meets all compliance standards. For you as a new seller, understanding how this process works and preparing properly will help you pass quickly and avoid delays.
During the live video call, an Amazon agent will ask you to show your government-issued ID, such as a passport or driver’s license, and sometimes your recent bank statement. You may also be asked to confirm your verified business address and answer questions about your products, sourcing, or business setup. The purpose is to ensure that your account matches all the information you submitted during registration, and that your business is legitimate and ready to sell on Amazon.
In 2026, you have two options for completing this verification: instant or scheduled. Instant verification allows you to join a short 3-6 minute queue and connect with an agent immediately. Scheduled verification lets you book a time slot up to seven days in advance, which can be useful if you want to prepare carefully or coordinate with your team. Both options achieve the same result, but choosing the right one depends on your readiness and availability.
To pass the live video call smoothly, there are a few important tips. Make sure your documents are clear and easy to read on camera. Keep your ID and bank statement ready to show without delays. Answer the agent’s questions confidently and honestly, especially regarding your sourcing methods, product categories, and registered business address. Avoid rushing or fumbling, as this can trigger additional checks.
Completing the live video verification successfully ensures that your Amazon Seller Central account becomes fully verified, giving you access to key features and tools for listing, shipping, and growing your business. By preparing carefully and following these steps, you can move past verification quickly and focus on launching your products on the platform.
Step 4: Listing Products & Using Auto Find Tools
The Product Opportunity Explorer is one of the most powerful tools you can use to auto-find profitable niches on Amazon in 2026. This tool helps you discover products with high demand, low competition, and strong potential for growth. Analyzing real sales data, customer searches, and trends, it allows you to make informed decisions about which products to sell, helping you maximize your revenue from day one. Whether you plan to fulfill orders through FBA or FBM, using this tool effectively can save you time and reduce risk.
Once you have identified a profitable niche, optimizing your product listings is the next critical step. Start with high-quality images that clearly show your product from multiple angles. Amazon buyers rely heavily on visuals, so professional, clean photos increase trust and conversion rates.
Next, make full use of A+ Content to showcase your product features, brand story, and benefits. This not only helps improve your listing’s appearance but also boosts its search ranking. Keywords are equally important—use the most relevant and high-traffic terms naturally in your title, bullet points, and product description to improve discoverability.
After your listings are optimized, focus on fulfillment and scaling. For FBA, send your products to Amazon’s warehouses to take advantage of Prime eligibility and fast delivery. For FBM, ensure your shipping process is efficient and reliable to maintain customer satisfaction. Continuously scan your sales data and customer feedback to identify opportunities for improvement or expansion. By refining your listings and scaling strategically, you can increase visibility, build social proof, and grow your Amazon business effectively.
Using the Product Opportunity Explorer, combined with optimized listings and smart fulfillment, gives you a competitive edge. It allows you to scan the market, fulfill orders efficiently, and scale your operations while staying aligned with the latest trends in 2026. This approach ensures that your products reach the right audience and achieve sustainable growth on Amazon.
Step 5: Brand Protection with Brand Registry 3.0

Brand Registry 3.0 is an essential step for any new brand selling on Amazon in 2026. This program gives you the tools to protect your intellectual property, control your product listings, and build trust with customers. Without enrolling in Brand Registry, your products are more vulnerable to counterfeiters, unauthorized sellers, or listing changes that could harm your reputation. For you, registering your brand ensures that your business maintains credibility and gains access to advanced features that help your products stand out.
To enroll in Brand Registry 3.0, you need a pending or registered trademark from an approved office, such as the USPTO. This trademark serves as your official proof of ownership, and it allows Amazon to grant you control over your brand listings. In addition, Amazon now requires permanently affixed branding on your products. This means your brand name must appear directly on the product itself, whether engraved, printed, or stitched. Stickers or mockups are generally not accepted, so it is important to ensure your branding is genuine and clearly visible.
Once you have your trademark and properly branded products, the next step is to upload and verify your products on Amazon. Use the Brand Registry dashboard to submit your listings, attach the Trademark Verification Code, and provide high-quality images showing your branding. The verification process will confirm that your products match your registered brand, giving you full control over your listings. This ensures that you can protect your products from misuse, manage content like titles and descriptions, and even access marketing tools like A+ Content to enhance your listings.
By registering with Brand Registry 3.0, you can actively protect your brand, build authority in your niche, and improve visibility in search results. Taking the time to properly register, upload, and verify your products ensures your new brand is positioned for long-term success on Amazon while safeguarding your intellectual property.
Step 6: Shipping and Logistics
When you start selling on Amazon in 2026, one of the most important decisions is choosing how you will fulfill your orders. Amazon offers two main options: FBA (Fulfillment by Amazon) and FBM (Fulfillment by Merchant). Each has its advantages and disadvantages, and understanding them will help you decide which method fits your business goals.
FBA is ideal if you want Amazon to handle storage, packaging, and shipping for you. By sending your products to Amazon’s warehouses, you can take advantage of the Prime Badge, which signals fast and reliable shipping to customers. FBA also allows you to scale quickly, as Amazon manages logistics and customer service, freeing you to focus on sourcing and marketing your products. However, FBA comes with fees for storage and fulfillment, and you need to plan your inventory carefully to avoid long-term storage charges.
FBM, on the other hand, gives you full control over your inventory and shipping. You store products at your own location, pack orders yourself, and handle delivery. This method can be more cost-effective for small sellers or unique products, but it requires more effort and time. You are responsible for maintaining customer satisfaction and meeting delivery expectations, which can impact your seller rating and visibility.
When using FBA, sending your first shipment correctly is crucial. You need to prepare your products according to Amazon’s requirements, including labeling, packaging, and creating an inbound shipment in Seller Central. Amazon uses systems like SIPP (Ships in Product Packaging) and inbound placement split to optimize storage and distribution. SIPP allows you to send products in their original packaging, while inbound placement split may direct your shipment to multiple fulfillment centers to ensure faster delivery to customers. Following these steps carefully helps you achieve the Prime Badge and increases your visibility on the platform.
Choosing between FBA and FBM depends on your resources, product type, and growth strategy. FBA is generally better if you want to scale quickly and leverage Amazon’s logistics network, while FBM may suit sellers who prefer control and lower upfront costs. By understanding the pros and cons, preparing your first shipment properly, and using systems like SIPP and inbound placement split, you can fulfill orders efficiently, improve customer trust, and scale your Amazon business successfully.
Step 7: Growth Strategies for the First 90 Days
The first 30 days after you launch your products on Amazon in 2026 are often called the “Honeymoon Phase,” and this period is critical for your success. During this time, the A10 algorithm gives new listings extra visibility to help you gain traction. How you handle these early days can set the tone for your long-term performance, so it is important to be strategic and prepared.
To take full advantage of the Honeymoon Phase, focus on building social proof and credibility. Amazon Vine is a powerful program that allows selected reviewers to test your products and leave honest feedback. Positive reviews not only increase customer trust but also help warm up the A10 algorithm, signaling that your listing is relevant and high-quality. Encouraging early reviews, maintaining excellent product images, and writing clear, optimized descriptions all contribute to faster ranking improvements.
While you are establishing your presence, it is also a good time to think about scaling and global expansion. Once your account is verified in your home country, Amazon allows you to open stores in other regions, such as Europe or Japan, with a few clicks. Preparing for this expansion means ensuring your listings, logistics, and branding can handle multiple markets. By scaling carefully and building credibility early, you increase your chances of long-term success on Amazon.
The Honeymoon Phase is your opportunity to warm up the A10 algorithm, build initial reviews, and position your products for growth. By focusing on quality listings, leveraging Amazon Vine, and planning for global expansion, you can scale your business efficiently and establish a strong foundation for continued success.
Common Mistakes to Avoid
One of the most common reasons new sellers face delays or account issues on Amazon in 2026 is discrepancies in addresses and documents. Amazon’s AI-driven verification and live video verification processes are designed to ensure that every detail of your account matches perfectly. Even small differences, such as “St.” versus “Street” or mismatched business names, can trigger manual reviews and hold up your account.
To stay compliant with KYC requirements, make sure your government-issued ID, bank statements, and business documents all reflect the same information. Confirm that your verified business address exactly matches what you entered in Seller Central. Taking the time to double-check these details prevents unnecessary delays and ensures your account moves smoothly through the approval process.
Another critical mistake to avoid is listing your products before your inventory is ready. While it may be tempting to get your products online immediately, doing so without stock can negatively affect your performance metrics and slow down algorithm visibility. If a customer places an order for an item that is not available, it can result in late shipments, canceled orders, and poor reviews. Instead, make sure your inventory is fully prepared, labeled, and shipped to your fulfillment method—whether FBA or FBM—before you make your listings live. This preparation ensures that you can fulfill orders promptly, maintain a strong seller rating, and take full advantage of the initial boost the A10 algorithm gives to new products.
By addressing discrepancies in your addresses and documents and avoiding premature listing, you demonstrate professionalism, protect your account from verification issues, and set your business up for reliable, scalable growth. Following these steps will help you meet KYC compliance standards, pass live verification efficiently, and start your Amazon journey with confidence.
Conclusion
Becoming a seller on Amazon in 2026 requires more than just signing up—it is a structured process that emphasizes preparation, verification, and strategic growth. To recap, the first step is choosing the right plan for your business, whether it is the Individual Plan for testing products or the Professional Plan for scaling. Understanding the “40-Unit Rule” helps you select the option that aligns with your sales goals and unlocks important features like bulk listing tools and Buy Box eligibility.
Next, focus on preparing your documents and completing KYC compliance. Amazon’s AI-driven verification requires high-resolution scans of your government-issued ID, bank statements, and EIN or SSN. Ensuring that every detail matches across your accounts and verified business address will prevent delays and speed up your approval. Completing the live video verification smoothly is also key, as it confirms your identity and business legitimacy in real time.
Once your account is verified, use tools like the Product Opportunity Explorer to auto find profitable niches, optimize your listings with high-quality images, A+ Content, and relevant keywords, and decide whether to fulfill through FBA or FBM. Enrolling in Brand Registry 3.0 will protect your intellectual property, while careful preparation for shipping, SIPP requirements, and inbound placement split ensures fast delivery and Prime Badge eligibility. During the Honeymoon Phase, focus on building social proof with programs like Amazon Vine to warm up the A10 algorithm and position your listings for long-term growth.
By following these steps, you combine thorough preparation, accurate verification, and strategic growth tactics to establish a strong foundation for your Amazon business. Start your journey today and use these steps to successfully become a seller on Amazon, giving your products the best chance to reach customers, generate sales, and scale efficiently in the competitive 2026 marketplace.
FAQs
1. What is the difference between the Individual and Professional Amazon seller plans?
The Individual Plan is best if you are testing products or selling fewer than 40 units per month. It has no monthly fee but charges $0.99 per item sold. The Professional Plan costs $39.99 per month and offers advanced tools, bulk listing options, and eligibility for the Buy Box, which is essential for scaling your business.
2. What documents do I need to complete Amazon’s AI-driven verification?
You will need a government-issued ID, a recent bank or credit card statement, and your EIN (for companies) or SSN (for individual sellers). All documents must match your account details exactly to pass KYC compliance and live verification.
3. How does the live video verification work?
During live verification, an Amazon agent will ask you to show your ID and bank statement on camera. They may also ask questions about your business address and product sourcing. You can choose instant verification, which takes a few minutes, or schedule a call up to seven days in advance.
4. How can I find profitable products to sell on Amazon?
You can use the Product Opportunity Explorer to auto-find profitable niches. This tool analyzes demand, competition, and sales trends to help you select products with high potential. Optimizing listings with high-quality images, A+ Content, and relevant keywords further increases your chances of success.
5. Why is Brand Registry 3.0 important for new sellers?
Brand Registry 3.0 protects your intellectual property, ensures control over your product listings, and improves customer trust. To enroll, you need a pending or registered trademark and permanently affixed branding on your products. Once verified, you can upload and manage listings while preventing unauthorized sellers from affecting your brand.
More wholesale article previews
Use these related guides to compare brands, categories, and supplier options before making your next wholesale order.
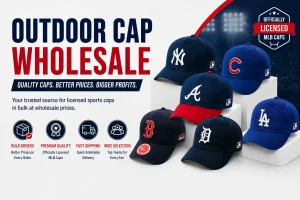 Outdoor Cap Wholesale: A Complete Guide to Buying Wholesale Outdoor Caps The demand for outdoor cap wholesale products continues to make caps an attractive category for retailers, sports stores,… Read guide →
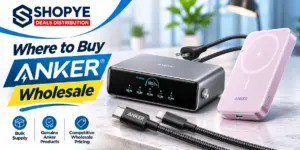 Where to Buy Anker Wholesale: Sourcing Guide for Electronics and Mobile Resellers Every device a customer owns is a charging problem waiting to happen, and Anker built its name on… Read guide →
 Where to Buy Owala Wholesale: Sourcing Guide for Sporting Goods and Gift Resellers The reusable water bottle went from commodity to cultural object in under a decade, and Owala rode that… Read guide →
 Where to Buy SadoTech Wholesale: Sourcing Guide for Home Improvement Resellers The wireless doorbell is the rare home product that sells itself in one sentence: no wiring, installs in… Read guide →
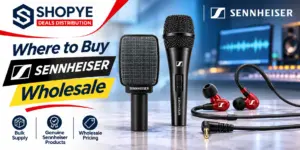 Where to Buy Sennheiser Wholesale: Sourcing Guide for Music and AV Resellers Pro audio is a category where the name on the microphone decides the sale before the customer hears… Read guide →
 Where to Buy CLIF Bar Wholesale: Sourcing Guide for Grocery and Outdoor Resellers Energy bars are the rare grocery category that sells in the checkout lane, the gym bag, the trailhead,… Read guide →